How to set up Taboola as a destination | GrowthLoop Docs
How to set up Taboola as a destination
Learn how to connect and send audiences to Taboola
In this article, we'll guide you through connecting Taboola to GrowthLoop and exporting your audiences to the destination.
- Make sure you have a Taboola account. If not, you can create one here!
- Have your Backstage API credentials ready (Account ID, Client ID, and Client Secret.) If you don’t have them, contact your Account Representative.
-
Log into GrowthLoop and click the Destinations tab on the left sidebar.
-
Then click New Destinations on the upper right side.
-
Next, search for Taboola in the destination modal and click Add Taboola.
-
Enter the required information in the modal, then click Create.
- Destination Name: This is how the destination will be named and referred to in the app going forward.
- Sync Frequency: This indicates how frequently audiences will be synced to the destination.
- Account ID: Your account identifier. Contact your Account Representative for this.
- Client ID: The identifier to access the Backstage API. Contact your Account Representative for this.
- Client Secret: The secret string for authenticating your account. Contact your Account Representative for this.
-
Navigate to your list of audiences by clicking the Audiences tab on the left sidebar.
-
Choose an existing audience or create a new one. Need help creating? Click here to learn how!
-
Once created, click the Export button on the upper right side.
-
Search for Taboola in the export modal and then click Add Taboola.
-
Map either Email, Device ID, or both under Configure Match Field Settings. Taboola uses these fields to match customers in their system. Click Next.
-
Configure your export settings: * Export Name: Automatically populated with your audience name for easy identification in the destination. * Campaign Type: Choose between a one-time export or ongoing basis. * List Status: Choose between new or existing.
- For new lists, it will use the audience name and add records to it.
- For existing lists, input the List ID to add records to it. * Export Schedule: Set the frequency, start date, end date, and specific days of the week.
-
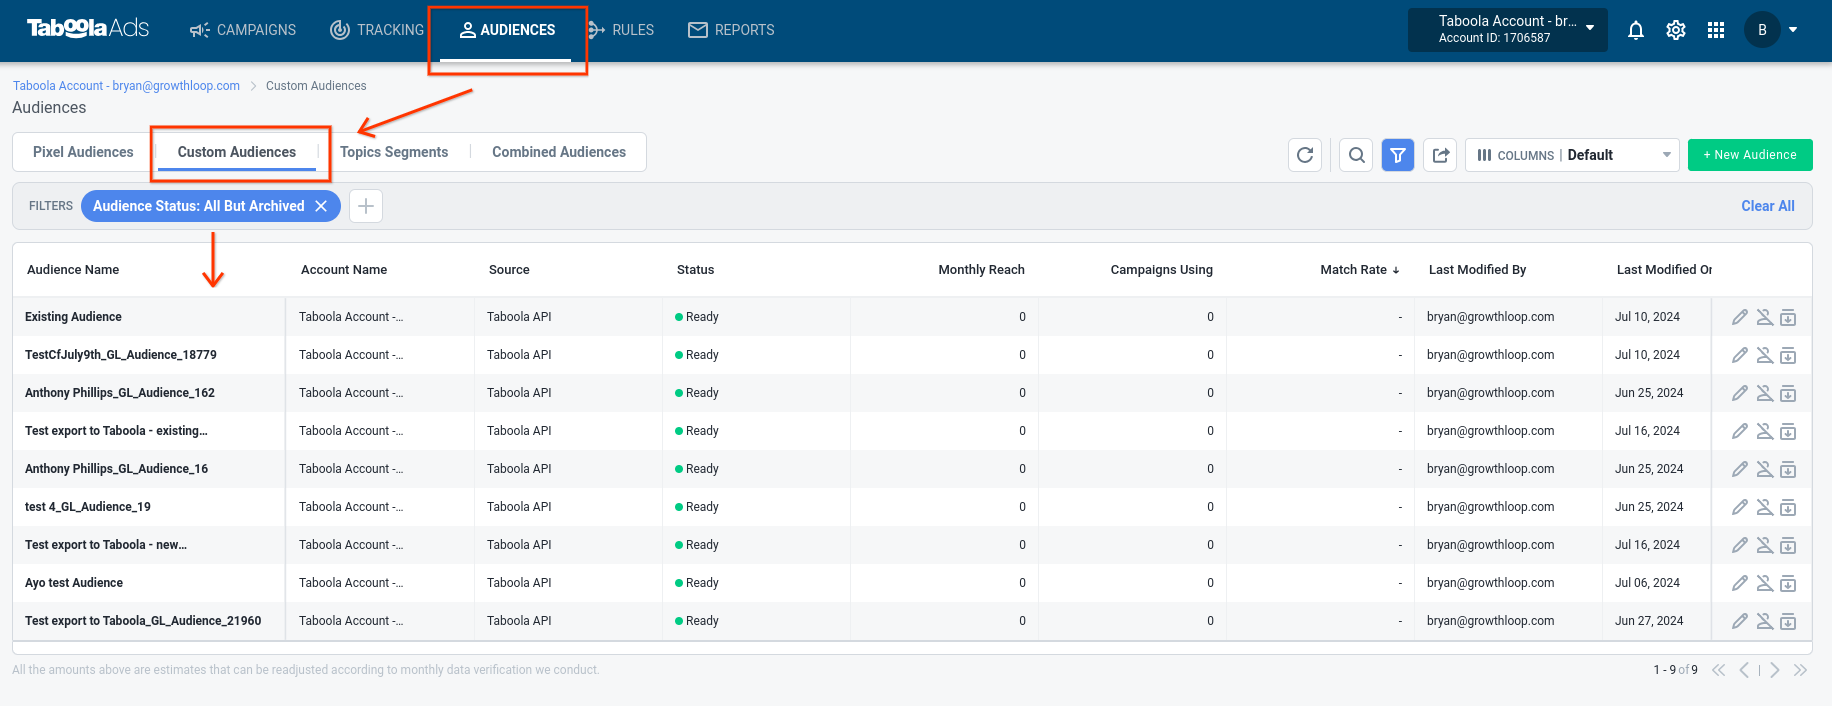
Lastly, click Export. Congrats on successfully exporting an audience to Taboola! To view your audience, log in to your account, click the Audiences tab, and select Custom Audiences. Note: it can take up to 1-3 days for the audience to fully populate.
📘
Experiencing any issues when connecting and/or exporting to Taboola? Reach out to us at [email protected] and we’ll be in touch shortly to help resolve the matter!
Updated 5 months ago